How to Set up a Booking Product On Selar
How to Set up a Booking Product On Selar
To create a booking product on your Selar dashboard, follow these steps:
1. Access the “Add Product” Option
After logging into your Selar dashboard, you can add a product in either of these ways:
Click the Add Product button on your dashboard, or
Go to the Products tab in the navigation bar and select Add Product
2. Select “Bookings”
Choose Bookings as your product type
Click Next to continue
3. Enter Product Details
Fill in the required information:
Product name
Product image
Price
Description
Category and subcategory
Once completed, click Save and Set Up Booking Availability
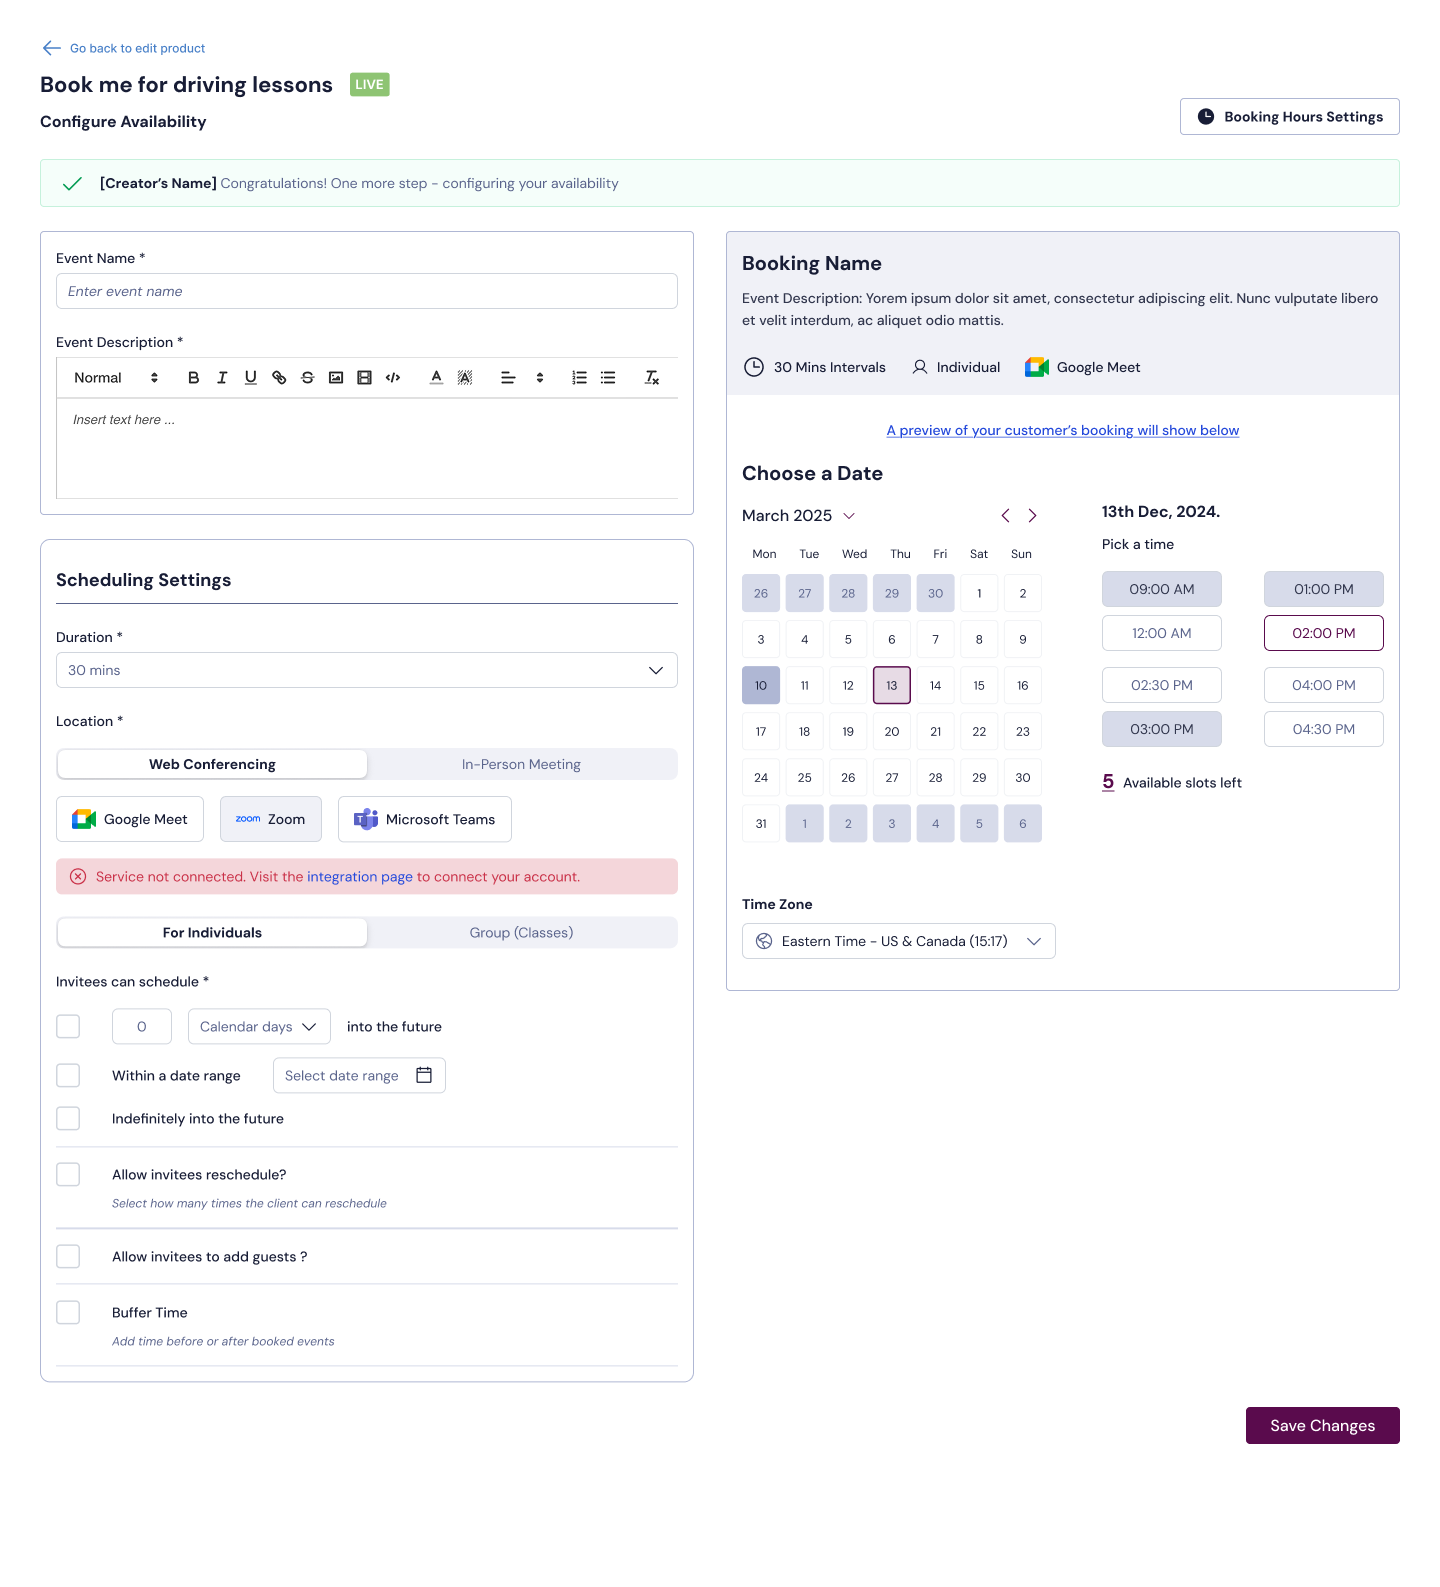
Setting Up Booking Availability
4. Configure Scheduling Settings
Scroll down to Scheduling Settings and set up the following:
Meeting Type
Choose between:
Web conferencing, or
In-person meeting
If you select web conferencing, choose your preferred provider:
Ensure all providers are connected from the Booking Calendar Integrations page- To connect your web-confrencing and Calendar, see article here
Google Meet
Zoom
Microsoft Teams
If you select In-Person Meeting, enter your address
Booking Type
Select whether your booking is for:
Individuals, or
Groups
5. Individual Bookings Setup
By default, Unlimited time slots is enabled
If you disable this option, you can manually define available time slots
You can also:
Set how far in advance invitees can schedule:
Within a specific date range
A set number of calendar days
Indefinitely into the future
Allow or restrict rescheduling
Add buffer time between bookings
 6. Group Bookings Setup
Set the maximum number of attendees per time slot
The key difference from individual bookings is that multiple attendees can book the same slot
7. Set Your Weekly Availability
After configuring your booking type:
Select your available days (Sunday to Saturday)
Set the specific time ranges for each day
You also have the option to:
Allow bookings over existing events
When enabled, Customers can book even if you have events in your external calendar
When disabled: Conflicting time slots will be unavailable
8. Save and Go Live
Save your schedule
Once saved, your booking product becomes live
Related Articles
How to Connect and Use Zoom on Selar
How to Connect and Use Zoom on Selar Selar integrates with Zoom to automatically generate meeting links for every session your customers book with you. This guide walks you through connecting your Zoom account, setting up a booking product with Zoom, ...How do I set my product prices in my own rates for different currencies?
Selar provides you with the flexibility to set your own currency rates for different currency pairs, allowing you to have more control over your pricing strategy. This guide will walk you through the steps to manually set currency rates for your ...How to Create a Digital Product on Selar Using the File Manager
How to Create a Digital Product on Selar Using the File Manager When creating a digital product (such as an ebook, video course, or downloadable file) on Selar, the File Manager helps you properly upload and select both your product image and product ...Will Selar promote my product?
Promotion Responsibility Selar does not promote your products for you. As a merchant, it's your responsibility to share your store and product links with potential customers. Sharing Your Links Copy your store/product links and share them on your ...How to Set Up Two-Factor Authentication (2FA) on Selar
How to Set Up Two-Factor Authentication (2FA) on Selar To keep your Selar account secure, Two-Factor Authentication (2FA) is now required for all users. Once enabled, you’ll need both your password and a verification code from your authenticator app ...